Corner adjustment
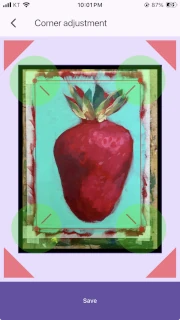
Align the corners of the image precisely when needed.
How to open it
Section titled “How to open it”Tap the Corner adjustment button in the center of the Image correction screen.
Tools for aligning corners
Section titled “Tools for aligning corners”Use these tools to place the corners precisely on the image.
Corner handles
Section titled “Corner handles”- Corner handles are semi-transparent green circles around a corner point. There are 4 corner handles in total.
- Tap a corner handle and drag to adjust its position.
- When dragging starts, the handle turns blue.
- You can drag anywhere except the red area shown on the screen while dragging.
Zoom in around a corner handle
Section titled “Zoom in around a corner handle”- There are four red triangles outside the image corners.
- Tap a triangle to zoom in as much as possible around the nearest corner handle.
- This is useful for fine-tuning the corner position.
Micro-adjustment arrows
Section titled “Micro-adjustment arrows”- When you tap a corner handle, small triangular buttons appear on the left, right, top, and bottom of the handle. These are the micro-adjustment arrows.
- Tapping these moves the handle by a tiny amount. This is useful for small adjustments that are hard to do by dragging the handle.
Zoom in
Section titled “Zoom in”Use a pinch-in gesture with two fingers to zoom in on the image.
Zoom out
Section titled “Zoom out”Use a pinch-out gesture with two fingers to zoom out on the image.
Double-tap to zoom out as much as possible
Section titled “Double-tap to zoom out as much as possible”- Double-tap the empty space in the image to zoom out as much as possible.
- This is useful when checking the corner positions across the entire image after adjusting them.
Align the corners
Section titled “Align the corners”- Use the tools above to adjust the position of each corner.
- When the corner positions look appropriate, tap the Save button at the bottom of the screen to save.
Leave without saving
Section titled “Leave without saving”If you go back after changing the position, a dialog appears and asks whether to save the changes. Save applies the changes, while Discard restores the last saved state.
The adjusted image may look like a different ratio
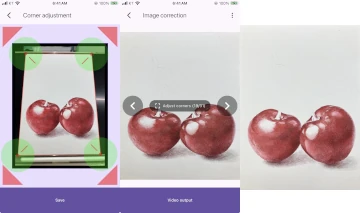
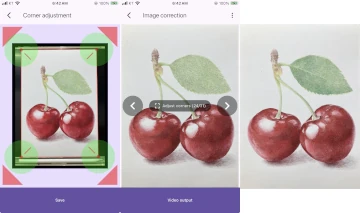
Section titled “The adjusted image may look like a different ratio”Depending on the angle between the paper and the camera when capturing the image, the result after corner adjustment may appear at a different ratio. However, the final output video (the last image on the right) is adjusted to the same ratio, so there is no need to worry.
Next step
Section titled “Next step”After saving or going back, you return to Image correction.